Steps to Safely Repairing Your Home's Foundation Cracks
Understanding Foundation Cracks
The integrity of your home's foundation is paramount to its overall stability and safety. Over time, various factors such as soil movement, weather conditions, and construction methods can lead to the formation of cracks in the foundation. Identifying and repairing these cracks promptly is crucial to preventing further structural issues.
Identifying the Types of Foundation Cracks
Before attempting any repairs, it's essential to understand the different types of foundation cracks. These include:
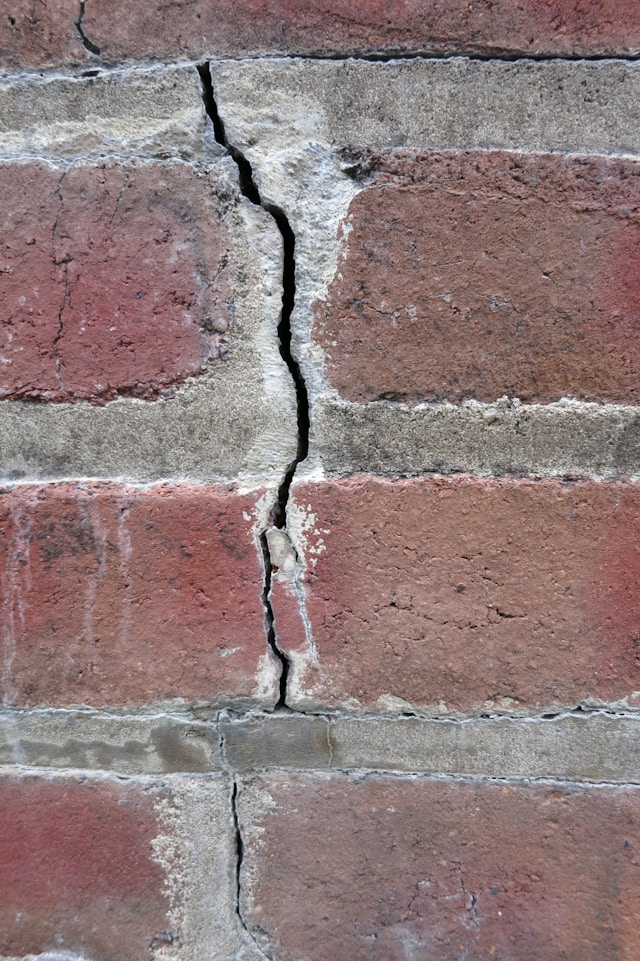
- Vertical Cracks: Typically caused by the settling of the foundation and are often considered less severe if they are narrow.
- Horizontal Cracks: Often indicate more significant pressure on the foundation walls, possibly from soil expansion and are usually more serious.
- Diagonal Cracks: Generally caused by differential settlement and can vary in severity.
Each type of crack requires a different approach for repair, so accurate identification is key.
Safety Precautions Before Starting Repairs
Safety should be your top priority when repairing foundation cracks. Here are some important precautions:
- Wear Safety Gear: Use gloves, goggles, and a dust mask to protect yourself from dust and debris.
- Ensure Structural Stability: If you suspect that a crack is affecting the structural stability of your home, consult a professional before proceeding.
- Check Weather Conditions: Avoid working in wet conditions to prevent materials from not adhering properly.
Materials Needed for Foundation Crack Repair
Having the right materials on hand will make your repair project smoother. Here's what you'll need:
- Epoxy or Polyurethane Injection Kits: These are used for injecting into cracks to seal them effectively.
- Patching Compound: Ideal for surface repairs after the injection process.
- Masonry Tools: Such as trowels and brushes for application and finishing.
- Calking Gun: Required if using cartridges for the injection kits.
Step-by-Step Instructions for Repairing Foundation Cracks
Step 1: Clean the Area
Start by cleaning the crack and surrounding area using a wire brush and water. Remove any loose debris, dirt, or old sealant to ensure a clean surface for the new material to bond with.
Step 2: Prepare the Injection Kit
If using an epoxy or polyurethane kit, prepare it according to the manufacturer's instructions. These kits typically include everything you need, including injection ports and sealing paste.
Step 3: Install Injection Ports
Install the injection ports along the length of the crack at intervals recommended by your kit. These ports will allow you to inject the sealant deep into the crack.
Step 4: Seal the Surface of the Crack
Apply the sealing paste around the installed ports and along the surface of the crack to create a tight seal. Allow this to dry as per the instructions provided with your kit.
Step 5: Inject the Sealant
Using a calking gun, inject the epoxy or polyurethane into the bottom port first until it begins to emerge from the port above it. Cap each port after injecting to keep the sealant from leaking out.
Step 6: Finish Up
Once the injection process is complete and dried, remove the ports and smooth over the surface with a patching compound if necessary. This step ensures a more finished appearance and further seals any small surface imperfections.
Pros and Cons of DIY Foundation Crack Repair
The Advantages
- Cost Savings: Doing it yourself can be significantly cheaper than hiring professionals.
- Control Over the Process: You can take your time to ensure each step is done correctly.
The Disadvantages
- Lack of Expertise: Misdiagnosing a crack can lead to insufficient repair solutions.
- Limited Tools: Professional-grade equipment may not be available for large or complicated cracks.
When to Consult Professionals
If you're dealing with horizontal or very wide cracks, or if there's noticeable movement in your foundation, it's best to call in experts. They have specialized tools and expertise that can address more severe issues that DIY methods might not resolve adequately.
Maintaining Your Foundation
Avoid future cracks by maintaining proper drainage around your home, monitoring for signs of soil movement, and scheduling regular inspections. Preventive measures can save you time and money on future repairs.